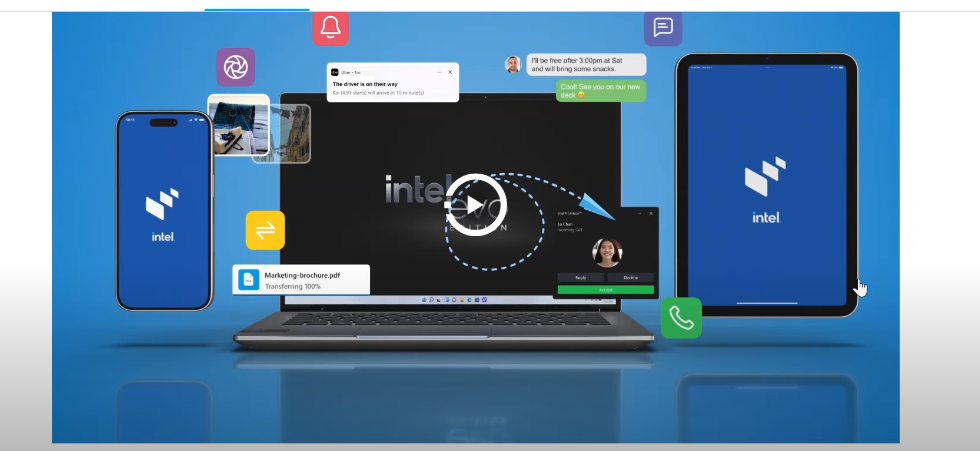
Have you ever taken stunning photos on your iPhone and thought, “How do I transfer these to my computer?” Emailing them seems slow, and who even uses cables anymore? Well, you’re in luck because I’ve got fantastic news for you. With Intel Unison, transferring photos, videos, and files between your iPhone and Windows PC has never been easier. No wires, no hassle, just fast, secure transfers over your local Wi-Fi network.
Whether you’re looking to quickly back up photos, transfer videos, or even send documents, Intel Unison has you covered. Let’s dive into how this awesome app works and how you can get started.
Step 1: Get Intel Unison on Your Devices
The first step to making your file transfers seamless is installing Intel Unison on both your Windows PC and your iPhone. Here’s how you do it:
For Your Windows PC:
- Open the Microsoft Store on your Windows computer.
- Search for “Intel Unison” in the search bar.
- Once it appears, click on the app and hit the Install button. It’s completely free, so no need to worry about any hidden costs.
For Your iPhone:
- Open the App Store on your iPhone.
- Search for Intel Unison and tap the Get button to download and install it.
Once both apps are installed, you’re ready to connect your devices.
Step 2: Connect Your iPhone to Your PC
Now that you’ve got Intel Unison installed on both devices, it’s time to link them up. Here’s how:
- Open Intel Unison on your PC. You’ll likely see some pop-ups asking for permissions—just click Allow to let the app do its thing.
- The app will display a QR code on your PC screen.
- Open Intel Unison on your iPhone and tap Scan QR Code. Use your iPhone’s camera to scan the QR code displayed on your PC.
- Make sure both your devices are connected to the same Wi-Fi network and paired via Bluetooth. Once done, your iPhone will be successfully connected to your PC.
Bonus Feature: Beyond File Transfers
Intel Unison isn’t just for transferring files. Once connected, you can access your iPhone’s notifications on your Windows PC. But that’s not all—you can even make and receive phone calls and text messages directly from your laptop. It’s like your phone and computer have become the perfect duo, working seamlessly together to boost your productivity and streamline your workflow.
Step 3: Transfer Photos and Videos from Your iPhone
Now, let’s get to the exciting part—transferring photos and videos. Here’s how:
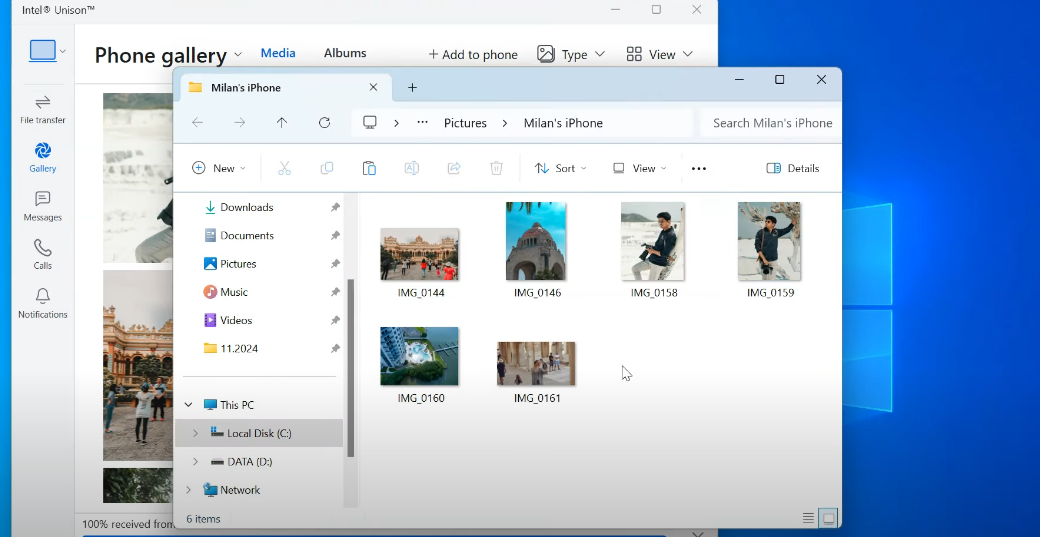
- In the Intel Unison app on your PC, select the Gallery option.
- All the photos and videos stored on your iPhone will appear on your computer screen.
- Click on the photos and videos you want to transfer. You can select multiple items if needed.
- Once you’ve chosen everything you want, hit Save and choose where you’d like to store your files on your PC.
- Open File Explorer on your PC, and you’ll see all the photos and videos you just transferred from your iPhone.
It’s that simple! Now your memories are safely stored on your PC, ready to be edited or shared.
Step 4: Send Files from Your iPhone to Your PC
What if you need to send files from your iPhone back to your PC? With Intel Unison, that’s a breeze too:
- Open the Intel Unison app on your iPhone.
- Tap the Send button, then select Files.
- Choose the files you want to send from your iPhone to your PC.
- The files will be transferred seamlessly to your Windows computer.
Step 5: Transfer Files from Your PC to Your iPhone
Intel Unison makes it easy to transfer files in the opposite direction as well. Whether you need to send a document, music, or a video from your PC to your iPhone, here’s how:

- On your Windows PC, drag and drop any file you want to send into the Intel Unison app window.
- The file will automatically be sent to your iPhone, where you can view, edit, or share it as needed.
Wireless Freedom: No Cables, No Hassle
With Intel Unison, you can finally say goodbye to slow and clunky file transfers. Whether you’re moving photos, videos, or documents between your iPhone and Windows PC, Intel Unison offers a fast, secure, and cable-free experience. Your devices work together like never before, seamlessly transferring data at the speed of your Wi-Fi.
If you enjoyed this guide, don’t forget to like and subscribe for more helpful tech tips. Have questions or tips of your own? Feel free to leave a comment below.
Thanks for reading, and happy transferring!